8/13/2024
If you’ve ever wanted to format text in Title Case within Excel, you’re in luck! Excel doesn’t have a built-in Title Case function, but you can achieve this with a bit of formula magic.
How to Do Title Case in Excel
Unlike Microsoft Word, where you can just hit a magic “Change Case” button and watch your text transform like a caterpillar into a butterfly, Microsoft Excel doesn’t have that luxury. Nope, Excel is all about rolling up its sleeves and doing things the hard way. But don’t worry, you’ve got some tricks up your sleeve!
You can use the UPPER, LOWER, or PROPER functions to give your text a makeover. Think of these functions as your Excel stylist—UPPER turns everything into uppercase, LOWER makes it all lowercase, and PROPER is like a text butler, capitalizing the first letter of each word while keeping the rest in lowercase.
Functions are just built-in formulas designed to tackle specific tasks. In this case, they’re here to rescue your text from the clutches of inconsistent capitalization. So, while Excel might not have a flashy button for this, it’s got the formula power to make your text look sharp and stylish—just like your favorite superhero, but with fewer capes and more commas!
How to Change Case?
In the example below, we’re putting the PROPER function to work, and it’s like a little text therapist for those all-uppercase names in column A. Imagine your names have been shouting all their lives—“I'M HERE!”—and now they need to calm down a bit. The PROPER function steps in like a gentle voice coach, telling them, “Just capitalize the first letter, and keep the rest of you lowercase, okay?”
So, if you’ve got names screaming in all caps like they’re trying to win a shouting contest, the PROPER function will gracefully turn them into well-behaved, properly capitalized names. It’s like teaching your text to have good manners—no more shouting, just polite and elegant first letters!
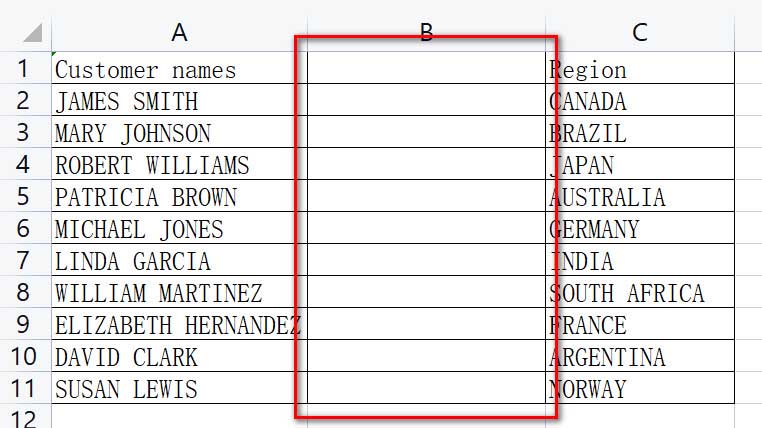
- First things first: let’s make some room for magic! Insert a temporary column right next to the column with the text you want to convert. Think of it as giving your text a little extra space to stretch its legs before it gets dressed up in proper case. In this example, we’ve added a shiny new column (B) to the right of the Customer Name column—like adding a VIP lounge for your text to hang out in while it gets its makeover.
So, if your names are feeling a bit cramped and need a bit of elbow room before their big transformation, this new column is their personal dressing room. No need to worry, they’ll be back to looking fabulous in no time!
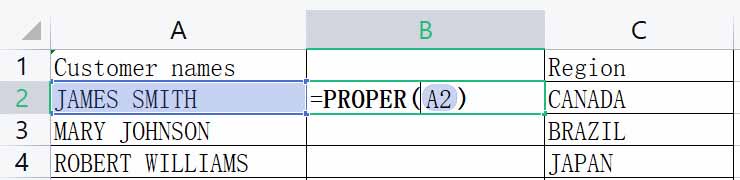
In cell B2, type =PROPER(A2), then press Enter.
So, you’ve got a name in cell A2 that’s shouting at you in ALL CAPS like it’s trying to win a loudness contest. Fear not, because Excel’s got your back! Use this magical formula to turn that uppercase shout into a polite, well-mannered proper case: =PROPER(A2) Voilà! Your name is now elegantly capitalized, just like a fancy title on a book cover.
But if you need to turn the text into a lowercase whisper, type: =LOWER(A2) Think of it as turning down the volume so your text can speak softly and carry a lowercase stick.
And if you ever need to crank the text back up to full volume with uppercase, just use: =UPPER(A2)
It’s like giving your text a megaphone so it can shout from the rooftops—just remember, with great uppercase power comes great responsibility!
So, whether you need your text to be a polite proper case, a whispering lowercase, or a shouting uppercase, Excel’s got the formulas to make it happen. Just swap out A2 with the cell you’re working on, and you’re all set!
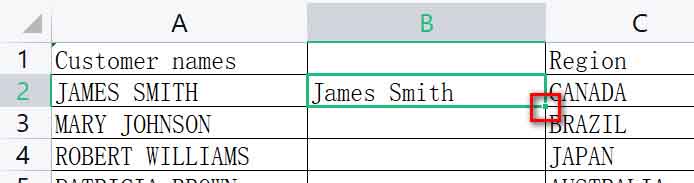
- Alright, let’s get to the fun part—filling down the formula in your shiny new column! To do this, follow these steps:
First, select cell B2. It’s like choosing the VIP seat at the concert of your spreadsheet. Now, find the tiny black square in the lower-right corner of the cell. It’s so small, it’s practically a secret agent!
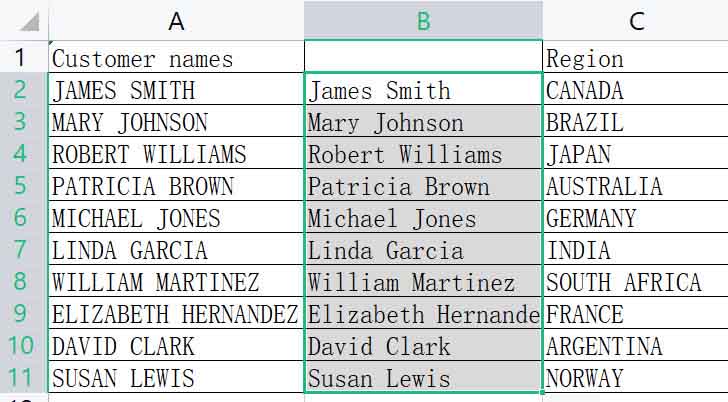
Double-click that little square as if you’re giving it a gentle nudge, and watch as Excel works its magic. The formula will cascade down the entire column like a perfectly choreographed dance routine. It’s as if Excel’s saying, “Don’t worry, I’ve got this. Just sit back and enjoy the show!”
So, with a quick double-click, your formula will be spread across the column faster than you can say, “Spreadsheet wizardry!”
Tip: If you’re working with an Excel table, it’s like having a personal assistant who’s really into spreadsheets. When you enter your formula, that diligent assistant will automatically create a calculated column and fill it down for you—no need to break a sweat or hire extra help!
So, you type in your formula, and it’s like magic—poof! Your entire column gets filled with values, as if Excel’s saying, “I’ve got this!” It’s like having a friendly robot that takes care of the repetitive stuff while you sit back and sip your coffee. Just remember, while Excel is great at automating, it won’t fetch you coffee—yet!
- Now that you’ve got your sparkling new values in column B, it’s time to give them a little vacation! Select those values like you’re picking the best chocolates from a box—go ahead, choose them all!
Once they’re highlighted and feeling loved, press CTRL+C to copy them to the Clipboard. Think of the Clipboard as a magical suitcase where your values get packed up and ready for their next adventure.
So, hit CTRL+C and imagine your values saying, “Woohoo! We’re off to see the world!” The Clipboard’s got them all packed up, and they’re just waiting for the next exciting step.
Alright, let’s wrap things up! Right-click cell A2 like you’re inviting it to a fancy party, and then choose “Paste” from the menu. But wait—there’s a special guest in town: “Values.” Click on “Values” like you’re selecting the VIP of your clipboard entourage.
This step is like sending the formulas on a permanent vacation, while the names get to stay behind and mingle. We don’t need those pesky formulas hanging around, so we’re politely showing them the door. Your clipboard’s got only the names, no hidden formulas, just the stars of the show!
So go ahead, click “Values,” and let the names enjoy their moment in the spotlight, while the formulas are off to have a well-deserved break.
- And now, for the grand finale! You can go ahead and delete column (B) because it’s had its moment in the limelight and is no longer needed. It’s like waving goodbye to a guest who’s overstayed their welcome at your spreadsheet party.
Just click on column B, hit delete, and watch it disappear like a magician’s assistant in a puff of smoke. No hard feelings—column B did its job and helped you out, but now it’s time for it to take a well-deserved rest.
So, with a swift click and a bit of spreadsheet magic, column B is outta here, leaving your document neat, tidy, and ready for the next exciting task!
Now,We can now easily handle this problem with titlecaseconverters.com.
- Select AP Style, fill in the information in the text box, and click the Convert Case button.
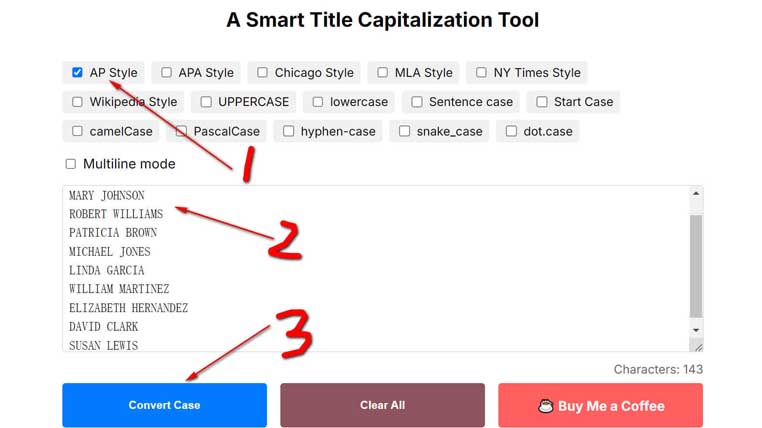
- Then you can easily use the result.